Heads Up 2 – Headstock Cracks (A Bit More Challenging)
In the last article, Heads Up 1 – Headstock Cracks (Easy-Peasy), we looked at a pretty basic repair of a cracked peghead. This time, we’ll take a look at one where the repair needs a little bit more thought.
A More Challenging Headstock Crack Repair
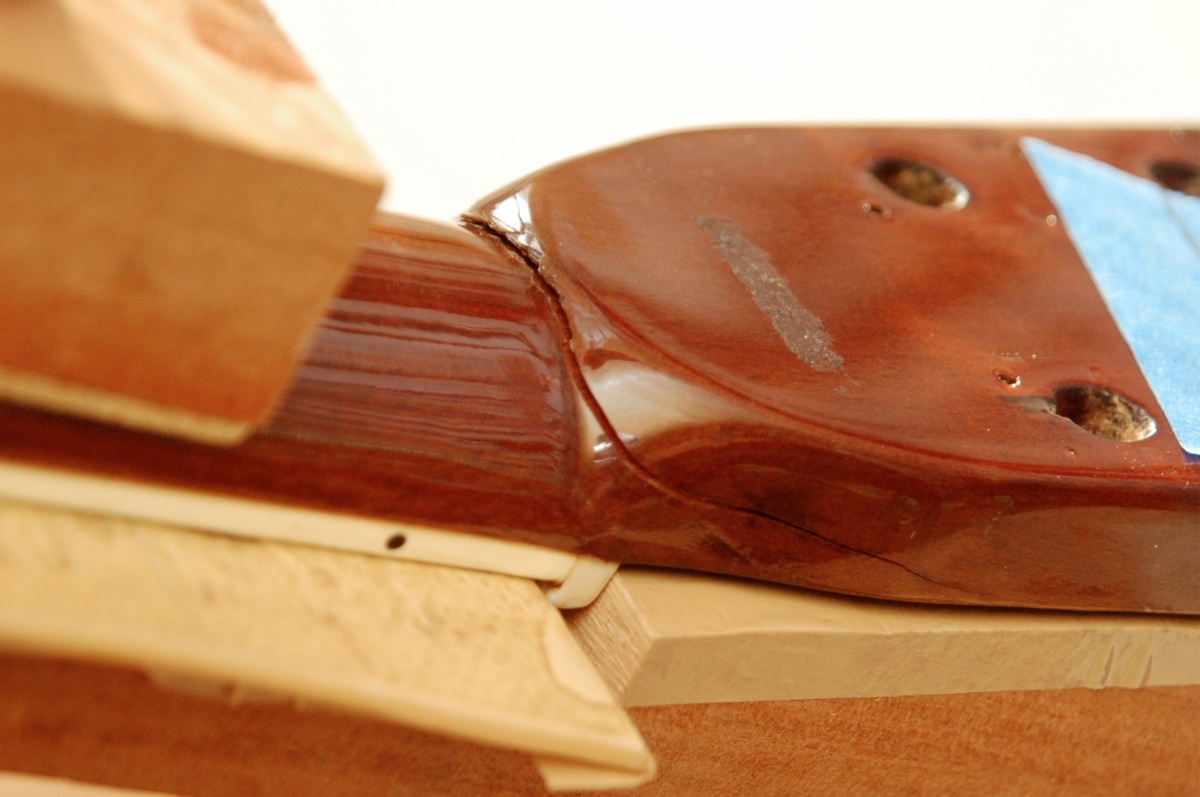
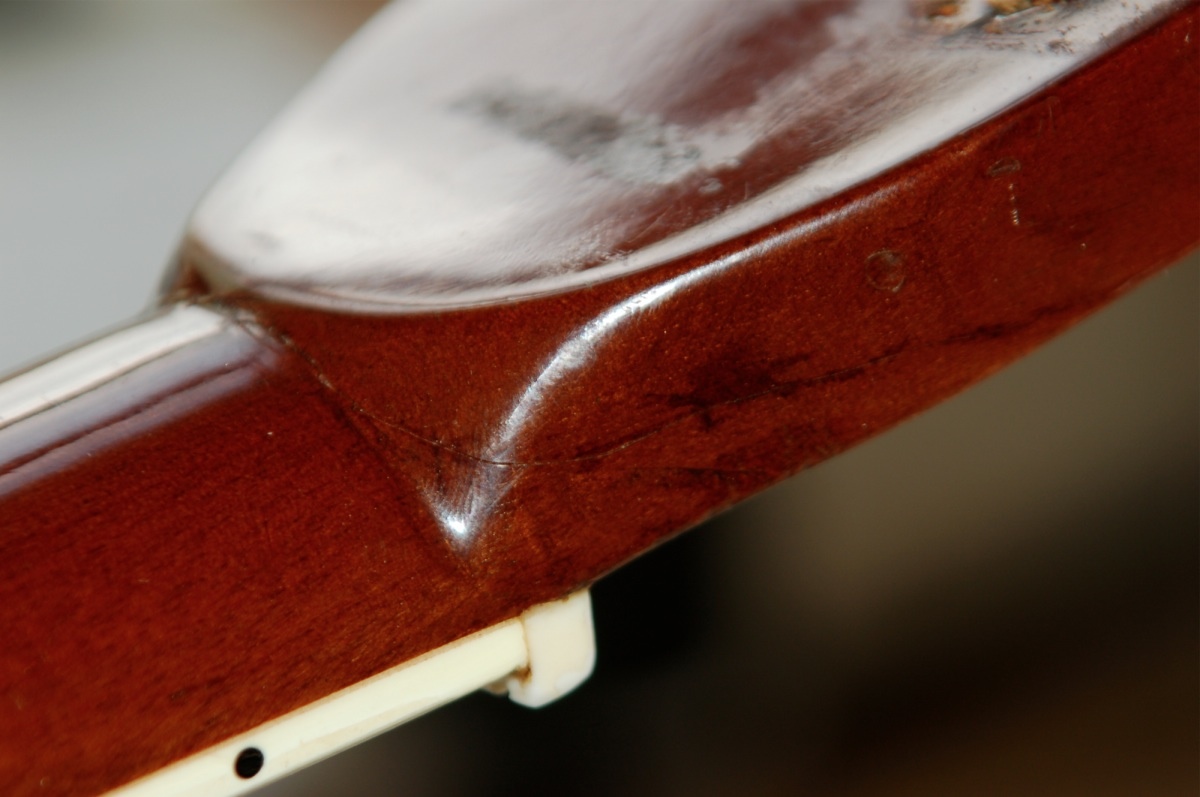 With string tension slackened, this crack is pretty hard to see. Even under string tension, it only opens a little. This makes things a little more difficult as it’s important to work the glue all the way into the crack to get the best repair. With a narrow crack like this, that can be a tall order.
Before I get that far though, I want to consider how I’m going to clamp this repair. Unlike the repair in the last article, the location and headstock shape means I’ll need to get inventive on this one.
Making a caul
The problem is that the carved portion at the end of the headstock, and the angle it meets the neck, means getting good, even clamping pressure there will be tricky. A few years back, I’d have fashioned a complicated wooden clamping-caul to fit the shape and angle (a caul spreads the clamping pressure across a wider area and protects the wood being clamped). This would have taken hours and would have entailed a lot of swearing and promises to raise prices on headstock repairs. Now though, I use a model-makers’ mouldable plastic. It’s sold under a few names – Stewart MacDonald sell it as Friendly Plastic.
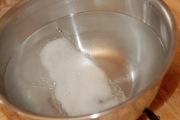
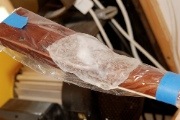
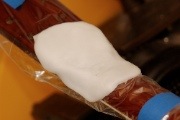
It comprises lots of tiny pellets that become soft and malleable when soaked in hot (very hot) water. Here, I’m soaking a plastic caul I’d used on another job – the plastic is reusable. When it becomes clear, it’s soft enough to mould into shape. I cover the headstock with a plastic bag to keep it dry and press the soft plastic to it, working it around the nooks and crannies. Leave it for a while and it hardens, becoming opaque white again.
Hey presto, a perfectly shaped, very strong clamping caul.
Repairing the headstock crack
 Now to the repair itself and this is the tricky bit. What’s necessary is to open out that crack a little to give the best chance of getting glue in there. Doing this is fraught with danger and requires careful consideration and very delicate handling. Experience and a ‘feel’ for the job is important – the tiniest fraction too much pressure and you’ll hear a horrifying snap. You’ll then be dealing with a break instead of a crack.
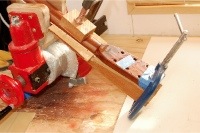 As you can see, I’ve clamped a relatively bulky piece of timber to the front of the neck and headstock. This is cut to an angle similar to the current headstock angle. Not quite though, as the slight mismatch allows me to use the G-cramp at the end of the headstock to slowly and gently apply pressure in order to open up the crack a little.
With that done, I mix up some hide glue and get to work heating it up. While that’s heating, I (very gently and carefully) use a heat gun to warm the area of neck around the crack. This is done slowly and gradually and I make sure not to heat the finish too much as it could damage it. If I go slowly, I can eventually warm the wood through. Why would I do this? Well having the wood of the crack warm will give more time before the hot hide glue gels when it’s applied. More time before gelling means more time to run into all the recesses of the crack.
Now it’s time to go (although I’ve done a dry run without glue before of course). In a further effort to get that glue all the way in, I’ve clamped the neck in a downward position to get gravity to lend a hand (actually, while I was actually applying the glue, I had the guitar completely vertical but I wasn’t able to take a photograph at that point).
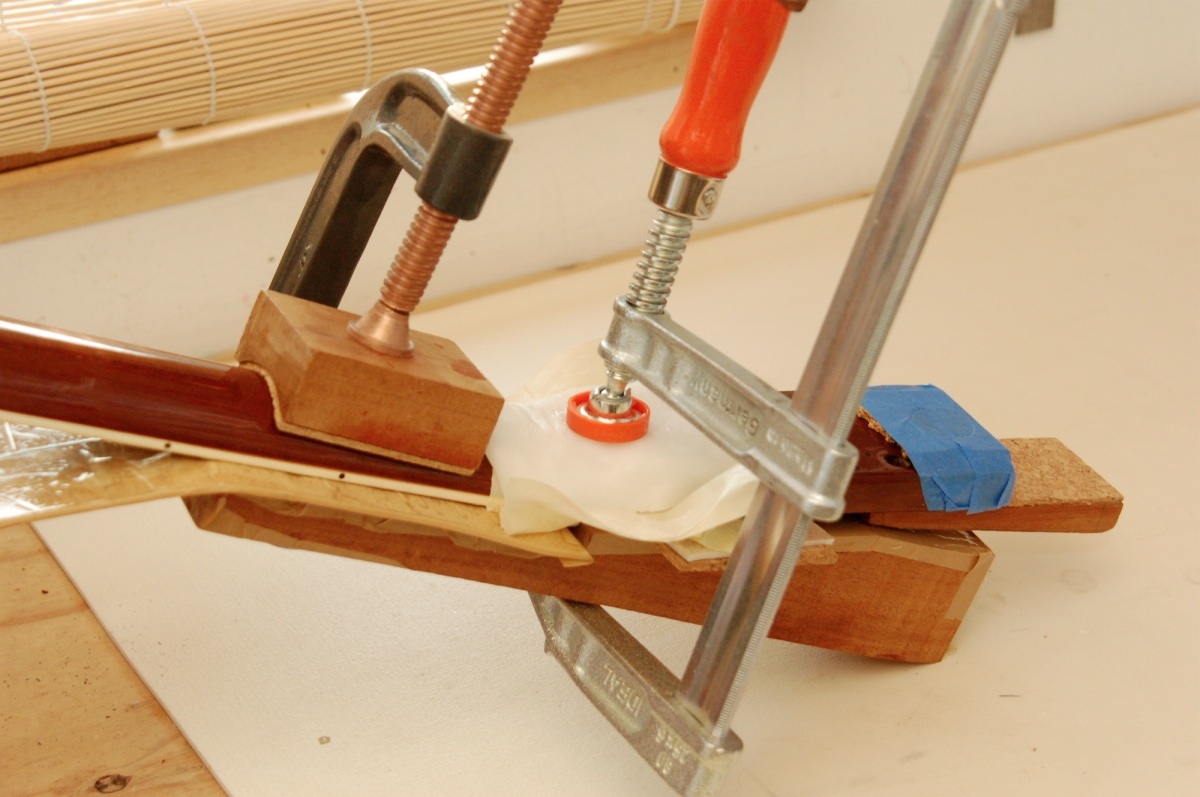 An advantage that the hot hide glue gives me is that I don’t need to make it terribly viscous. I can mix it a little thinner without affecting the final strength too much. I apply it into the crack with a pipette and I put in more than I need. I don’t mind making a bit of a mess to get this one done right. I work fast as even the pre-warmed wood won’t keep that glue liquid for long. Then I quickly wedge the headstock back using a cork-lined wedge. This gets the crack shut quickly and I see some glue squeeze-out all along the crack – even down the bottom. This is a good thing. I then apply my pre-made plastic clamping caul and clamp it in place to properly seal up that crack.
 Then I leave it. For a day. I resist the temptation to disassemble my clamping setup even after leaving it overnight. I know that this is overkill but I like to play safe with these jobs.
After I unclamp everything, it looks pretty good. There’s a bit of dried glue around the repair but that’s easy to clean up. The crack is shut tight and that’s what I want. If I can (and I could in this case), I like to string these up to tension and keep in the workshop for a few days before letting the customer have it back. It makes me feel more confident that the repair’s not going to fail.
This was a clean repair. No finish touch-up was necessary and it’s solid, sound and pretty discrete
Next time, we’ll take a look at a more serious break. Stay tuned.
This article was brought to you by Gerry Hayes from the workshop of Haze Guitars. Haze Guitars provides instrument repair, restoration and upgrade services in Dublin, Ireland.