Guitar Repair: Acoustic Neck Break (Reassembly)
 A little ways back, I discussed the removal of an acoustic guitar’s neck for repair. I also talked a little about my opinions on the construction of that particular guitar. The neck-removal post was getting a little long so I decided to split out the reassembly part.
Putting an acoustic guitar back together generally involves some glueing. Sometimes more and sometimes less.
A bolt-on neck will generally just require that the fingerboard extension (the part past where the neck meets the body) be glued to the guitar top while the bolts inside will handle the job of pulling, and securing, the neck into the body.
A dovetail neck joint requires this but also needs glue in the joint itself. Depending on the manufacturer, the face of the heel (the flat portion that butts against the guitar side) may be glued too. Some guitar makers (Martin, for instance) don’t apply glue there while others (Gibson for example) glue it. This is one of the reasons it’s a bit more work to perform a neck reset on a Gibson.
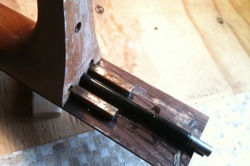
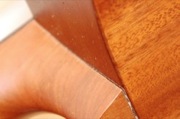
In the case of this particular guitar though, the heel face is entirely flat and is all a glueing surface. The steel box-section tenons must also be glued into their corresponding mortice (channel) in the top and the fingerboard extension must be fixed to the guitar top.
Complicating matters is the fact that there is no force that would pull the neck into the body in the same way as a dovetail or bolt-on joint would. This means I had to clamp the neck into the body in some fashion while the glue cured.
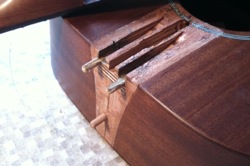
Some inventive clamping-caul making later…
And I had a wooden caul that would fit the curved heel, letting me clamp the neck into the body. Ready to go. I did a couple of dry-runs with no glue as this was a tricky clamping job. When I was happy I could get the clamps on quickly and accurately, I went for it.
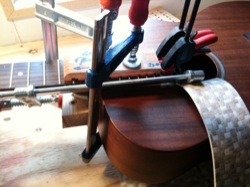
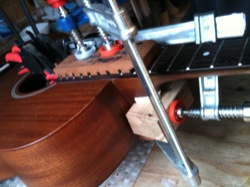
That clamp in the photos—running from the soundhole to the heel—wouldn’t normally be required but this instrument’s construction made it necessary. The clamp doesn’t actually contact the soundhole edge but I’ve got a piece of linoleum there to play it safe.
Once the glue’s properly cured, it’s ok to unclamp. I replaced the fret I removed (see the previous post) to help steam off the neck, made sure it was secure and level and I strung this little fellow up to make sure it played well.
This job was a little more involved than it might be on a different guitar. All that’s not important though. What’s important is that this guitar is making music again. That’s always good.
This article was brought to you by Gerry Hayes from the workshop of Haze Guitars and is cross-posted there. Haze Guitars provides guitar repair, restoration and upgrade services and makes beautiful, hand-built instruments
[mc4wp_form]