Helping Prevent Broken Guitar Strings
 Gah! Broken strings. Who needs ’em?
I remember learning to play guitar as a poor teenager and seeking out music stores who sold single strings as I couldn’t afford to replace a whole set. I remember winding extra turns unto my tuners and, when a string broke, carefully tying its ball-end onto the slack in the string so I could avoid having to buy even another single string.
While all of that may have been character-forming, it wasn’t much fun. If only I’d known then about a relatively simple method of reducing the risk of broken strings.
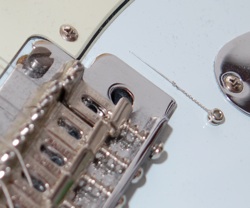
While a string can break pretty much anywhere, it tends to do so where it’s ‘stressed’. The position it receives the most stress (in many guitars – especially Strats and Teles) is the sharp bend where it comes through the body and ‘kinks’ over the edge of the bridge plate before going over the saddle and on its journey up the neck. This is a very common spot for strings to break which is why you’ll often have ball-ends with an inch of string left on them.
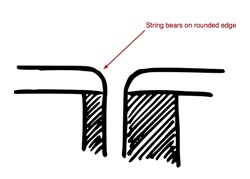
The problem is this sharp bend and the fact that the string’s tension bears against a hard edge where it exits the body (or trem-block in the case of a Strat type guitar). The solution is to soften the edge. When you’re done, the string will bear against a rounded corner rather than kinking sharply.
This is done pretty simply. Remove the saddles and intonation screws of the strings that are causing the issue – while it’s normally the lighter strings that break, it’s worth doing this for all strings at the same time (it doesn’t hurt your quest for stable tuning)
 As in the (bridge cross-section) picture above, gently round the edge of the bridge plate at the hole where the string exits. You can do this with a round needle file and then remove any scratches with a few different grits of sandpaper (I’d go 220, 320, 400, 600, 1000 grit in that order). Take your time – the finer and more scratch-free you can get your ’rounding’ the better as it will give a clean path for the string. Any scratches could potentially cause tuning issues.
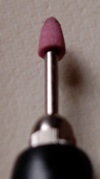
Alternatively, you can use your Dremel (or similar) tool with a suitable grinding bit. If you use one of these, remember to clean up the rounding with sandpaper too. Get it nice and shiny.
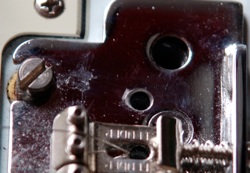
 An image of the job in progress is shown on the right (click to embiggen). This has been rounded over and will be polished with finer sandpaper to finish it off.
As always, be careful. Don’t attempt this unless you’re sure you can complete it without hurting yourself or your guitar. Also, if you have a vintage Stratocaster that’s worth more than most people’s houses, you might want to consider whether you really want to do it – this isn’t a major mod but you have to err on the side of anally-retentive.
If you’re unsure or reluctant, however, there is an alternative:
Years ago, I read an interview with Stevie Ray Vaughan’s guitar tech and I understand that he used to pop a short section of plastic insulation from an electrical wire over the strings to cushion it a little at these points. Personally, I’d rather keep out anything that could possibly interfere with tone but if you’re having string breakage issues and are not keen on making these changes to your guitar’s bridge, it might be worth trying.
As always, if you’ve any questions, feel free to ask.
This article was brought to you by Gerry Hayes from the workshop of Haze Guitars.
Haze Guitars provides instrument repair, restoration and upgrade services in Dublin, Ireland.


