Martin Custom Bridge Replacement – Part 1: Bridge Removal
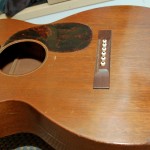 This is a bit special. It’s a lovely, pre-war Martin. Actually, it’s pre-1934 if you want to get a little more precise (but only a little) – it’s fitted with bar frets.
It’s been through the wars a little and has, at some stage in the past had a long side-crack repaired. That repair has lasted some time from the look of it and doesn’t overly concern me.
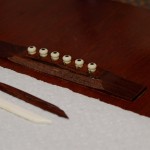
What is a concern, however, is the bridge. The leading edge has cracked and broken off under string-tension. The owner saved the piece that snapped off which gives us a few options for a repair.
- Repair the existing bridge by glueing the broken piece back on. Tidy up the saddle-slot as required. This approach has a couple of issues in that, firstly, the broken piece already has an existing – repaired – crack from a previous break somewhere in the mists of time and, secondly, the repair would be under the same stresses as the bridge originally was. This might be fine if it is well repaired but it does run a risk which leads us to…
- Repair using the broken piece as per #1 but rout the saddle-slot deeper to provide more surface for the saddle to bear against. This would spread the load and would be safer. It would show no external signs of the deeper slot and a new, higher, saddle would obviously be used.
- Repair as per #1 and fill the saddle slot with new rosewood before re-routing the slot. Benefits of #1 and #2 with (possibly) a little extra security.
- Remove the bridge and replace it with a new bridge, custom made to match the existing one. This is, structurally the safest option but has the disadvantage of making this vintage instrument less ‘original’.
After considering the options, the customer has decided to go with option 4. He’s a player and a sound instrument is more important to him. This option actually has an added benefit in that the original saddle slot was slightly out of position which actually caused some intonation issues. By making a new bridge, we can correctly position the new slot and improve the intonation. It’s nice when that happens.
Right then. Let’s get started. By the way, clicking on any of these images will display a larger version.
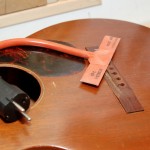 To remove the bridge safely, it’s necessary to heat the glue that holds it in place. There are a few ways to do this but one of the easiest and safest is to use a heating blanket like that pictured opposite.
Basically, this is just an electrical heating element in a flexible housing of (I think) some sort of rubber. When you plug it in, it gets hot.
The idea is to clamp it to the bridge and let the heat pass through the bridge to warm the glue below. When it’s sufficiently warm, the glue begins to give up its grip and you can remove the bridge.
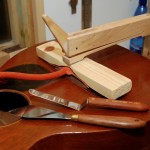 On the right, you can see the heating blanket clamped to the bridge. It’s important to keep the blanket (and its cable) from touching to guitar top as the heat can damage guitar finishes.
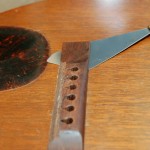
The blanket is a little shorter than the bridge on this guitar so I need to heat ‘in shifts’. I’ll do one end first and then the other. You can see it’s clamped to the bridge top with a shaped caul (that wooden block that covers it). The cam-clamp is not closed very tightly, by the way – it’s only holding the blanket in place. Tightening a clamp on a guitar in this position would be a good way to crack the top. You can also see the palette knives I use to help. These are used to slide between the bridge and guitar top to help things along.
It’s really, really important to do this gently and with care. It’s very easy to force the palette knife too far and to actually rip into the guitar top and remove wood.
Take your time and don’t force things. Let the heating blanket do its work for a few minutes, take it off and try the knife. Don’t overdo it – if you hit resistance, pop the blanket back on and wait again. Keep the knife clean as you work – warm water will generally do the trick.
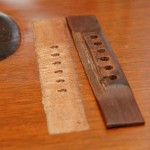 Gently work from one side to another (especially if your heating blanket is too short like mine). Don’t rush it and, eventually, the bridge will come loose without a fight.
I was a little worried about this one as the sloped crack from the missing section made it very difficult to apply heat under the front of the bridge. In the end however, there is only a very little tear-out here. You can clearly see the rectangular portion that had its finish removed to glue the bridge on originally. It’s nice to think that the last time that tiny section of wood saw daylight was more than seventy-four years ago.
I’ve got to go and fashion a replacement bridge now. Keep ’em peeled for the next in this series which will document that process. Make sure you don’t miss it by subscribing to the Guitarless feed via RSS or email.
See all articles, so far, in this series on Martin Custom Bridge Replacement.
This article was brought to you by Gerry Hayes from the workshop of Haze Guitars.
Haze Guitars provides instrument repair, restoration and upgrade services in Dublin, Ireland.

